Showing posts with label chemical free. Show all posts

Sunday, June 18, 2017

Toxic-Free Waterproof Sunscreen


The very talented Kate Doubler has a DIY sunscreen recipe that I have been using the last 3 summers and it is very easy to make, effective, and not full of all those harsh chemicals!  All you need is a double boiler, Mason Jar, coconut oil, sweet almond oil, beeswax, shea butter, vitamin E oil, ZincOxide powder, lavender essential oil, and storage containers.


Add in a double boiler:
  • 1/2 cup coconut oil
  • 1/4 cup sweet almond oil
  • 1/4 cup beeswax
  • 2 Tbsp. shea butter
  • 1 tsp. vitamin E oil

Melt all then remove from heat and add liquid into a mason jar.  Add 20-30 drops of Lavender Essential Oil and 2 Tbsp. ZincOxide Powder.  Add the lid and shake (the reason for this step is so you avoid breathing in the zinc powder).


Pour into silicone containers or a glass jar.  I love these ones!


I store in the refrigerator after summer to help it last longer.  It works great and is even waterproof!

The first time I used it, I was pregnant and at the beach in Florida.  I was nervous thinking my hormones would whack everything up and the sunscreen wouldn't be effective, but I was wrong!  And an added bonus is the lavender oil as it is great for your skin and can help with burns.

ZincOxide has a natural SPF of 20 and Coconut Oil has an SPF of 10.  So this sunscreen is about 30 SPF.

Enjoy!!

xoxo ~K

Monday, April 17, 2017

Chapstick in a Jar


Since 7th grade, I have been a Blistex junkie.  I couldn't go ANYWHERE without it in my pocket.  My jeans even were faded from where I had it.  It was bad.  Needless to say, there have been studies done that prove addictive chemicals are added into chapstick to made it so addictive. 

Once I delved into the Holistic world, this was the first thing I wanted to make.  I got onto Pinterest and found some recipes.  They were ok, but not fabulous.  Then, my sister gave me some and it was FABULOUS! And it's only 3 ingredients!


To make, you will first need to get some empty chapstick containers.  I got mine on Amazon and they were cheap and nice.  You will also need 1/4 cup coconut oil, 1 Tablespoon and 1 teaspoon beeswax, your choice of essential oil, a large Mason jar, aluminum foil, a pot, and water.

Aluminum foil for Chapstick!?  Let me explain.....

When I first made chapstick, I'd spill most of it pouring it out of my large glass bowl used for my double boiler.  Then, I found a magical way to make chapstick.


Take some aluminum foil and fold into long pieces.  Add to the bottom of a pot and add a few inches of water.  Place your large Mason jar on the aluminum foil and bring the water to a boil.  Add the coconut oil and beeswax inside the Mason jar.  The aluminum foil acts as a barrier so the oil and wax does not burn.  Once the water is heated, it will melt the oil and beeswax. 


Once melted, remove from the pot and add 20 drops of your favorite Essential Oil.  I have used Peppermint and just recently used Eucalyptus and I love them both!  After the Essential Oils have been added, stir and then pour directly into the empty chapstick container. 


After cooled, add caps and enjoy! Makes about 13 tubes!


Thursday, April 13, 2017

Body Butter Recipe

 
I was listening to my favorite Essential Oils Podcast and they shared a Body Butter recipe.  I was really wanting to make a moisturizer and everyone I had made so far, I have hated.  Well, this Body Butter recipe is the BEST!

If DIY-ing is scary to you, take a deep breath, and give it a try! If you find easy recipes, get a few items to use, and materials, you can make just about anything!! I have the following materials and have made a lot of stuff with them:
  • Beeswax
  • Shea Butter
  • Cocoa Butter
  • Coconut Oil
  • A variety of other carrier oils (Sweet Almond, Jojoba, etc.)
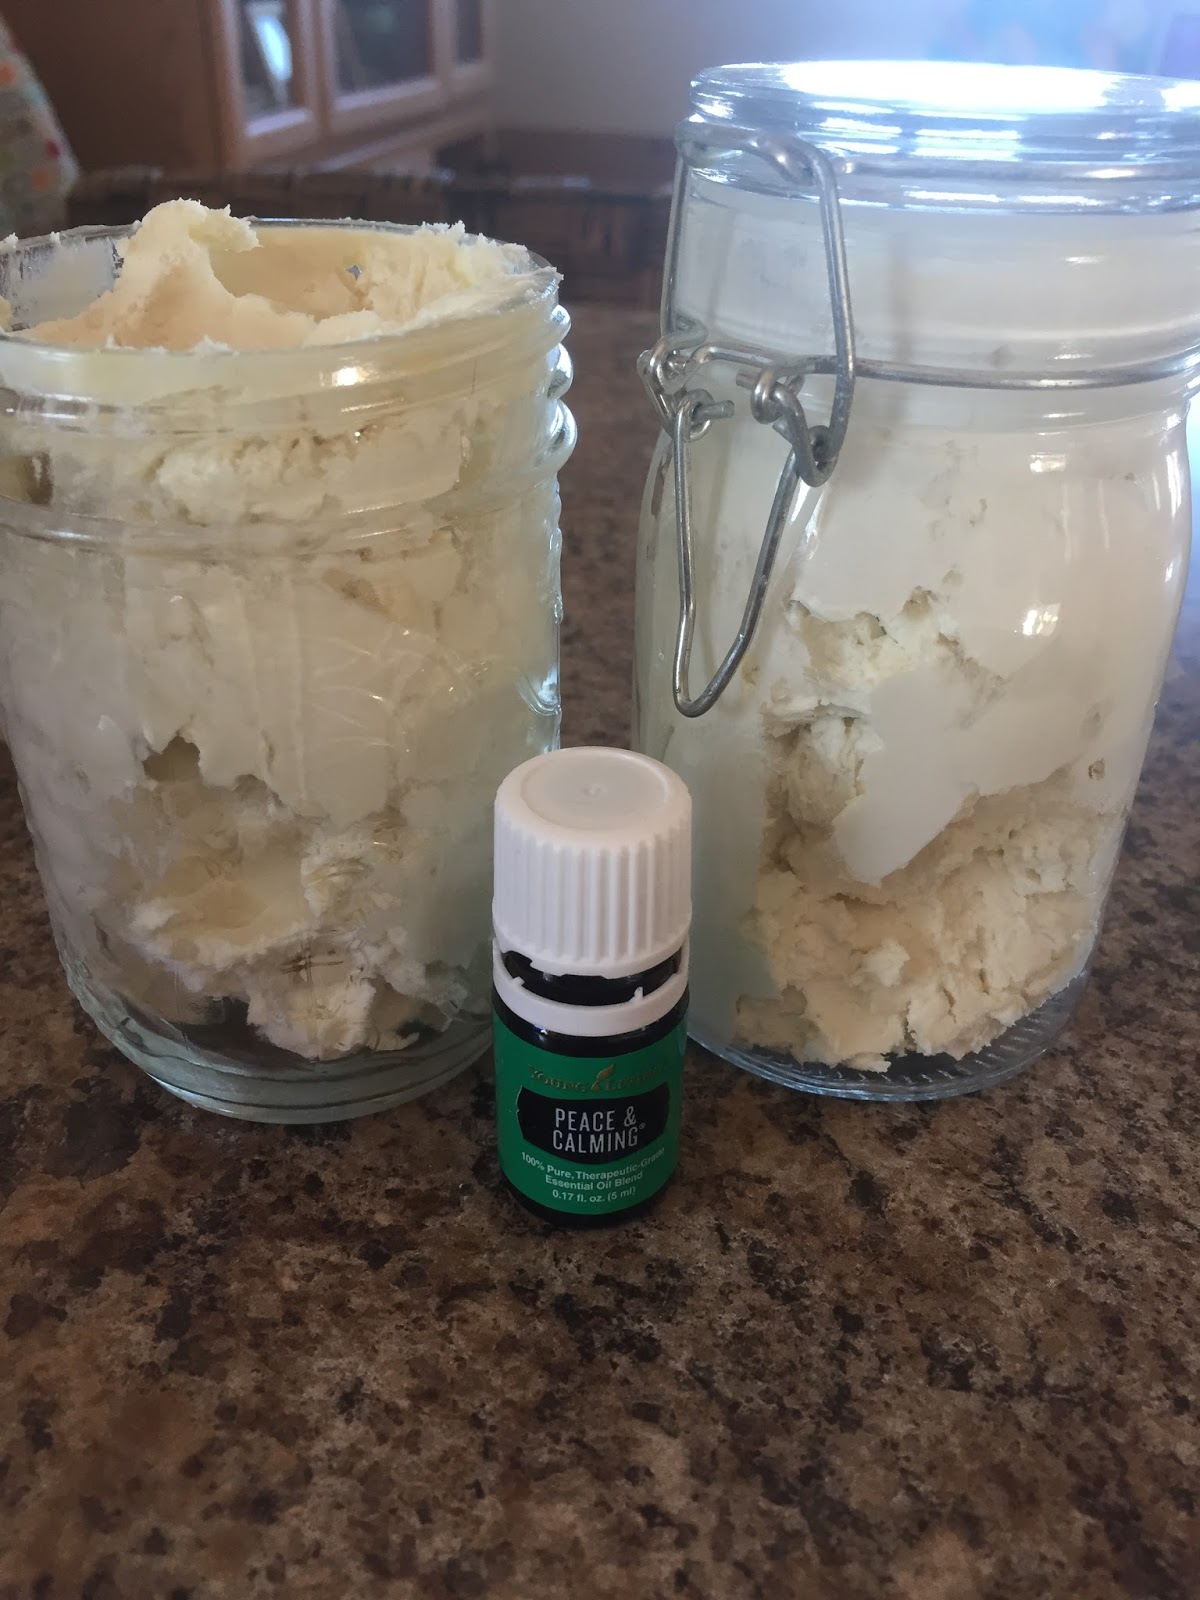
To make the Body Butter, you will take 1/4 cup coconut oil, 1/4 cup sweet almond oil, 1/4 shea butter, and 1/4 cup cocoa butter and add to a double boiler. I use a glass bowl over a pan halfway filled with water.  Melt all of those then remove from heat.


I allow to cool about an hour then put it in the refrigerator.   This allows it to cool quicker.  If it was winter, I would have stuck it outside.  Around 2-3 hours later, take it out, mix around with a spatula and then add about 10-20 drops of your favorite Essential Oil.  I chose Peace and Calming because it's my favorite!


Then, use a hand mixer and whip away!!  Whip until stiff peaks.  And....viola!  You've made Body Butter!


Friday, March 31, 2017

DIY Foaming Hand Soap

This is by far the EASIEST DIY you will ever do!  You need a few ingredients that can be found at your local grocery store, co-op, or Amazon:
  • Empty Foaming Hand Soap container (or reuse one!)
  • Castile Soap (I prefer the Mild Baby so it's safe for even the littlest hands)
  • Essential Oil of your choice (Get it here)
  • Distilled Water
Simple add 1/3 cup Castile Soap to the Foaming Hand Soap container, then 5-10 drops of your favorite EO, fill almost all the way with distilled water, then add the top.  Leaving a little extra room will make sure it doesn't spill over.....which mine always does!  LoL.   But I just wash my hands with the spillage. 

That's it!! 

No need to shake or stir.  You could use regular tap water, but it would have a cloudy look.  The only key thing is to add the EOs to the Castile soap, because remember.....oil and water don't mix!

Enjoy and stay healthy!!

In good health,

xoxo~K

Thursday, March 23, 2017

How can I get started with essential oils?


The easiest way to get started with essential oils is to first research.  The essential oil market is so saturated now that they are selling them at big-box stores with only a few dollars.....BEWARE BUYER!  A true essential oil (even if it says 100% pure) is not pure for only a few dollars.  These are chemically made "essential oils" which show minimal if not any traces of plant matter that makes up an essential oil.  You will not see the benefits of using these "cheap oils"!

A great place to start your research is at Seed to Seal.  This explains the process in which true essential oils are created.  Starting with the seed, then cultivating the plant, distillation process, testing of all oils, and sealing the bottle.  Young Living is one of the best companies out there for essential oils!  They have farms all over the world and hold high standards to give you the purest, most natural oils ever!

The easiest way to get started using essential oils is by purchasing a Starter Kit.  This is a small investment to give you 11 of the most commonly used oils and an amazing diffuser! Plus samples of other products and information on the company, products, and usage.  You will become a distributor and get 24% off any other purchase.  The only commitment you have to make, is by ordering $100 of product before your year is up.  If you chose not to purchase anything else, your membership will simply expire with no other penalties.  

The oils that come in the Starter Kit include:

  • 5 mL Frankincense
  • 5 mL Lemon
  • 5 mL Lavender
  • 5 mL Copaiba
  • 5 mL Peppermint
  • 5 mL Thieves blend
  • 5 mL Purification blend
  • 5 mL PanAway blend
  • 5 mL R.C blend
  • 5 mL DiGize blend
  • 5 mL Stress Away blend *Bonus oil
There are so many things you can do with these oils that it would last awhile and get you familiar with using essential oils.

However, Young Living offer so many more amazing oils, products, and specials that you will probably not stop there!

To look into purchasing a Starter Kit, click here and create a "member" account for pricing and information.  If you are interested in order a few oils to try it out, click here and sign up as a "retail customer".

Please feel free to email me with any questions at krissyswango@gmail.com.

In Good Health-

xoxo ~K

Monday, January 2, 2017

hApPy NeW yEaR- to a clean, chemical free year!


Happy 2017 everyone! As we embark on a new year, you may be making resolutions or intentions for the New Year.  This is a great time for new beginnings and fresh starts.

A start I would like you to consider is the chemicals in your home.  Yes I said it, chemicals.  Our homes are infested with hundreds of chemicals- hundreds!  From your candles, to air fresheners, to dryer sheets, to cleaning projects, to make up- they are toxic!!

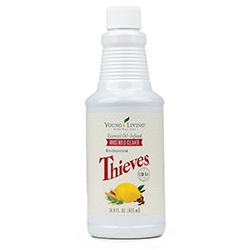
A simple start to the new year is making your own cleaning products.  This can be as simple as vinegar and water in a spray bottle for an all purpose cleaner.  But Young Living makes an AH-MAZING cleaner base that can be used for SO much!  It's the Thieves Household Cleaner:
This can be used to make an all purpose spray, toilet bombs, a bathroom scrub, soft scrub, so many more possibilities!


May you have a healthy and prosperous 2017!

xoxo~K

Wednesday, November 9, 2016

DIY Laundry Detergent

I've made laundry detergent a few times and I always reverted back to the store bought kind.  I think it had a lot to do with the grating of the soap and always grating my fingernail.  LoL.

I just listened to a podcast that talked about all the chemicals in them that are mislabeled and lead to many complications.  Of course, I knew most of this and was so excited I had been using my DIY for a few months before.

But I've changed to a recipe that involves no grating (of soap OR my fingernail) and I am confident that this will keep me on track to always making my own.

Now I've always had the debate......powder vs. liquid detergent.  Our washer is very old, but still cleans so I am all about keeping it.  I feel like powder detergent gets them cleaner with an old machine but I also notice powder still in my pants that was left over.  Partly because I do not like to wash in warm so the powder never dissolves.  So I am reverting back to liquid.

I found this great recipe that uses liquid castile soap and no cook or wait time.  Also, it is Borax free!  Borax has a rating of an F on the EWG's website   because there’s “high concern” for developmental, endocrine, and reproductive effects.  I don't want any of that near my baby who now uses the same detergent as us.


DIY Chemical Free Laundry Detergent
All you have to do it add the Super Washing Soda and a little warm water until dissolved, then do the same with the Baking Soda.  Add almost all the water and then at then end, add you castile soap and essential oils, mix and voila!   Use 1/3 cup per load.  

 May your clothing smell lovely and chemical free!

xoxo ~K

Tuesday, January 6, 2015

Essential Oils 101

My journey with essential oils began last school year.  I had a student wil a lot of behavior issues.  His parents were very supportive and willing to try anything.  His mom came across an article on how essential oils can help with students' attention and behaviors.  She bought a blend and began using it on him.  Within weeks, I saw HUGE improvments! 

This made me start to think....is there a way to heal our bodies without chemicals and with natural ingredients? 

YES THERE IS!!  Essential Oils are the answer!

I started looking on Pinterest (it's better than Google if you ask me) and found a lot of information.  My sister invited me to join a webinar about essential oils and I was so excited about the possibilities to naturally heal my body!

Did you know as women we put 500 chemicals in our body a day!  This can be through make up, medicine, hair and face products, as well as food.  I thought to myself, "I want to eliminate as many chemicals in my body as I can!"

So I signed up to get a starter kit through Young Living Essential Oils and was very excited to start using the oils.  In the Premium starter kit, I received 11 oils, a diffuser, and samples. 


Once my oils came, I started expermienting and am very happy with them!  I will be sharing about each oil in seperate posts. 

Essential Oils have the highest frequency (MHz) than anything else.  Which means there is a better chance for overall wellness.  A lot of essential oils are not 100% pure, but mixed with other carrier oils (coconut, jojoba, almond, avacado, olive oils etc.).  Young Living essential oils are 100% pure and a therapeutic grade.

Essential Oils can be used three different ways: topically, internally, and inhilation.

Topically
Oils can be applied neat directly to the skin.  They can also be mixed with a carrior oil and applied to skin.  Mixing with a carrier oil helps your oils last longer (which I learned the hard way...lol). 

One of the best places to apply oils is to the bottom on your feet. Your feet have a lot of pores and absorb oils quickly.  Your spine is another great place too.  If you are having issues with the top half of your body, apply from the bottom to the top of your spine.  If you are having problems with the bottom half of your body, apply from the top to the bottom of your spine.  Pretty much, you are pulling the oils towards the half of your body that needs it. 

Internally
Most therapeutic oils can be consumed internally (see labels for more information on oils- NOT ALL be consumed).  There are a few ways you can do this:
  • Simple add it in a liquid (coffee, water)
  • Make a capsule like these
  • Add drops of oil on a spoonful of honey
  • Add drops under tongue or on the roof of your mouth
Inhilation
The fastest way for essential oils to be absorbed into your body and bloodstream is direct inhilation.  When a drop of oil lands on your skin, it takes 2 seconds for it to be absorbed in your bloodstream. This can be done by:
  • Breathing oils directly from the bottle
  • Add a drop of oil on hands, rub together, and inhale.
  • Using in a home diffuser and the starter kit comes with a great one!  The diffuser mixes water and the oils and creates a cool mist, almost like a humidifier.
How to get a Welcome Kit
Order a Premium Starter Kit as a wholesale member through my link and I will send you a welcome gift! Young Living is a referral business. Meaning that you have to order through someone’s link – someone that referred you! I would love it, if you purchased your oils through me.

As a thank you, I will send you an awesome welcome gift with some tools to get you started with your oils! If you sign up as a wholesale member with Young Living, you get 24% off all of your essential oil purchases! Often people are confused by the term “wholesale member”, not realizing that there is nothing required of them.

If you sign up as a wholesale member you have absolutely no obligation to purchase more oils or to sell the oils, ever! If you want to keep your wholesale membership, then you have to order 50PV (essential $50) worth of oils or products a year, that’s all. If you don’t do that, there is no penalty, you’ll just lose your 24% discount.


The “Enroller ID” and “Sponsor ID” boxes should already be filled in for you. If they aren’t for some reason, my ID is 2073220, and you can fill both the boxes with this number.

The Premium Starter Kit (which is what I got) comes with:
  • The 10 Everyday Oils Collection (5 mL bottles) Lemon, Lavender, Peppermint, Thieves, PanAway, Frankincense, Copaiba, Purification, R.C., and DiGize. 
  • A home diffuser
  • A bonus oil! 5 mL bottle of Stress Away
  • Aroma Glide roller fitment turn your most used oil bottle into a convenient roll on
  • 10 sample packets (I keep these in my purse for traveling and emergencies while out)
  • 2 NingXia Red 2-oz. samples (antioxidant supplement)
When signing up, not only do you get amazing oils to use to help heal your body, but you also get a superb network of people.  There are Facebook groups and newsletters that give you ideas and help.  And the company is excellent!  They have a Seed to Seal guarantee.  Young Living was founded in 1993 and they only sell about 28% of the products they make.  The other 72% of their products are used as pesticide- talk about organic!!

Ok, enough rambling on and on about this great company and products.  If you have any questions, please feel free to email me at KrissySwango@gmail.com.  :)

In good health,

~Krissy

*These statements have not been evaluated by the FDA and are not intended to diagnose, treat, prevent or cure any disease.